
3ds max select by name slow/fast

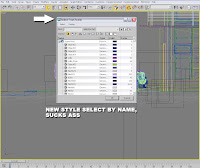
Ok, let me get this out of the way first - I am still using 3ds Max 2008. Autodesk would like me to be using Max 2010 by now, even though its only March 2009, but I couldn't be arsed. One of the things I hated about using Max 2008 for the first time was the "new" object selection box. (Select by name, H on the keyboard) If you have many objects in your scene (And even if you don't have that many), it is incredibly sloooooow. Very annoying when all you are trying to do is select an object from a list. So, the best thing to do is to revert back to the "old" object selection box. This is how you do it:

Go to this ini file:

C:\Documents and Settings\<>\Local Settings\Application Data\Autodesk\3dsmax\2008 - 64bit\enu\defaults\MAX\CurrentDefaults.ini
where <> is your windows user name

and change:

[Scene Explorer] SelectByNameUsesSceneExplorer=1
to:
[Scene Explorer] SelectByNameUsesSceneExplorer=0

Thanks to V-Ray Forum user dbibb for this trick!


Popular posts from this blog

How to create a mirror with 3ds max and V-Ray

Creating a mirror with 3ds Max and V-Ray In this tutorial we will create a simple, framed mirror with 3ds Max. We will then create the V-Ray materials for this mirror, and finally we will render out a simple 3d scene, showing reflections in the mirror. I am assuming that you have a basic knowledge of 3ds Max, so I won't explain absolutely everything, but it should still be easy enough for beginners to figure out what is going on in this tutorial. Step 1 Creating the mirror surface. Create a box in the front viewport that is approximately 70cm x 40cm x 0.4cm (Note, it doesn't have to be exactly this size and if you would prefer to work in inches or other units, that's also okay, I'm just used to working in cm.) Step 2 Create the actual V-Ray mirror material. Open up the material editor and change the first material in the material editor to a VrayMtl. Rename this material "mirror surface" and make it totally reflective, by making the reflect col

How to create a wireframe material with V-Ray

Welcome to this tutorial on making a wireframe material with V-Ray. To complete this tutorial you will need 3DS Max with V-Ray. Step 1 The fist thing we need to do is create an object that we will apply our wireframe material to, in my case I made a simple teapot. Add a camera to the scene too. Step 2 Create a normal V-Ray material. (Open up the material editor and change the first material in the material editor to a VrayMtl). Rename this material "wireframe" Step 3 Add a map to the diffuse channel of the material (by clicking the little square box next to the diffuse colour swatch). Choose the VRayEdgesTex map. Step 4 You will notice that the default colour for the VRayEdgesTex map is white. (This means the wires of the wireframe material will be white. You can change it to any colour you like, but let us leave it as white for now. Notice too that you can change the thickness/units of the VRayEdgesTex map and that you can choose to show the hidden edges too. (t

District 9 before/after images on fxguide

There is a whole host of sweet before/after images from the movie District 9 at fxguide The article's words also explain quite a lot about the shooting techniques, equipment and CGI workflow used in the making of District 9.