Welcome to this tutorial on making a wireframe material with V-Ray. To complete this tutorial you will need 3DS Max with V-Ray.
Step 1
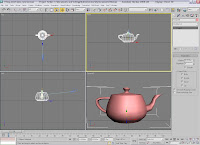
The fist thing we need to do is create an object that we will apply our wireframe material to, in my case I made a simple teapot. Add a camera to the scene too.
Step 2
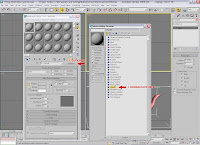
Create a normal V-Ray material. (Open up the material editor and change the first material in the material editor to a VrayMtl). Rename this material "wireframe"
Step 3
Add a map to the diffuse channel of the material (by clicking the little square box next to the diffuse colour swatch). Choose the VRayEdgesTex map.
Step 4
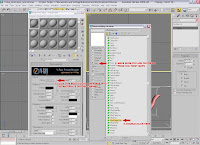
You will notice that the default colour for the VRayEdgesTex map is white. (This means the wires of the wireframe material will be white. You can change it to any colour you like, but let us leave it as white for now. Notice too that you can change the thickness/units of the VRayEdgesTex map and that you can choose to show the hidden edges too. (triangular faces as opposed to rectangles)
Step 5
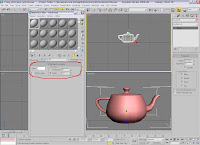
Assign the "wireframe" material to your teapot/3d object. (you can just drag and drop it from the material editor onto the teapot). Now render the camera view. (Press F10 on the keyboard).
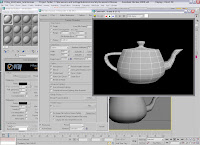
Step 6
Lets modfy the "wireframe" so that it is transparent, with just the white "wires" visible. To do this copy the VRayEdgesTex map from the diffuse channel to the opacity channel in the maps rollout of our "wireframe" material.
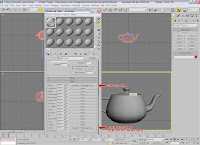
This map in the opacity section works just like an alpha channel - If it is white, the wires are 100% visible. If it is black the wires are invisible. If it is grey, the wires are semi-transparent.
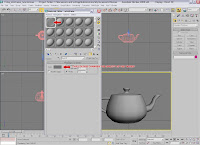
Lets reset the colour of both VRayEdgesTex maps to white, and render our camera view again.
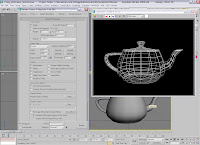
There you go - you've completed the tutorial and know you know how to create a wireframe material with V-Ray!
JG3D has moved and is now at http://www.jg3d.net/
We pulled into the Rustlers Valley Music festival in Karl's Opel Astra 200ts. That was THE yuppiemobile to have South Africa in 1996, but it looked a little out of place amongst the ageing VW kombis and landrovers parked in the fertile grasslands. Tye-dye t-shirts and hippies everywhere. Karl, turned around and said to us: "remember, fussy doesn't fuck." And so we ventured forth into the unknown...
Step 1
The fist thing we need to do is create an object that we will apply our wireframe material to, in my case I made a simple teapot. Add a camera to the scene too.

Step 2
Create a normal V-Ray material. (Open up the material editor and change the first material in the material editor to a VrayMtl). Rename this material "wireframe"

Step 3
Add a map to the diffuse channel of the material (by clicking the little square box next to the diffuse colour swatch). Choose the VRayEdgesTex map.

Step 4
You will notice that the default colour for the VRayEdgesTex map is white. (This means the wires of the wireframe material will be white. You can change it to any colour you like, but let us leave it as white for now. Notice too that you can change the thickness/units of the VRayEdgesTex map and that you can choose to show the hidden edges too. (triangular faces as opposed to rectangles)

Step 5
Assign the "wireframe" material to your teapot/3d object. (you can just drag and drop it from the material editor onto the teapot). Now render the camera view. (Press F10 on the keyboard).

Step 6
Lets modfy the "wireframe" so that it is transparent, with just the white "wires" visible. To do this copy the VRayEdgesTex map from the diffuse channel to the opacity channel in the maps rollout of our "wireframe" material.

This map in the opacity section works just like an alpha channel - If it is white, the wires are 100% visible. If it is black the wires are invisible. If it is grey, the wires are semi-transparent.

Lets reset the colour of both VRayEdgesTex maps to white, and render our camera view again.

There you go - you've completed the tutorial and know you know how to create a wireframe material with V-Ray!
JG3D has moved and is now at http://www.jg3d.net/
We pulled into the Rustlers Valley Music festival in Karl's Opel Astra 200ts. That was THE yuppiemobile to have South Africa in 1996, but it looked a little out of place amongst the ageing VW kombis and landrovers parked in the fertile grasslands. Tye-dye t-shirts and hippies everywhere. Karl, turned around and said to us: "remember, fussy doesn't fuck." And so we ventured forth into the unknown...